Using marks:
Waypoints
Tracks
Routes
Areas
Images
Scales
Mark properties
Any map, mark, or status background that MapGazer displays can have variable transparency (that, show more or less of any other data that it covers). In particular:
- Base map – the primary map for a window. It is drawn over a white “canvas”, therefore making it more transparent lightens (de-saturates) the map so that marks, etc., are more easily seen. When the cursor is over the base map (and there is no other map, see below) you can press the ‘+’ or ‘−’ keys to increase or decrease the visibility (reduce or raise the transparency) of the base map in 5% intervals. The base map is by default opaque (0% transparent).
- Overlay map – a supplementary map, usually chosen to allow
additional information to be displayed; for example, a geological
map or satellite map might be overlaid on a topographical map, or
a topographical map overlaid on a satellite or street map. See below
for more details and an example.
If there is an overlay map but no third map then the ‘+’ and ‘−’ keys affect its visibility instead of that of the base map. The default for the overlay map is 50% transparent.
- Third map – another supplementary map, which allows a third
source of mapping (e.g., satellite + topographical + geological).
If there is a third map then the ‘+’ and ‘−’ keys affect its visibility instead of that of the base map. The default for the third map is 50% transparent.
- Marks (tracks, waypoints, routes, scales, etc.).
Marks are by default opaque (0% transparent).
- Status information background (e.g., current location of
the mouse cursor, shown at top left, also map copyright and zoom
level, shown at bottom right) – see Settings.
Status information is displayed as opaque black text shown on, by default, a 20% transparent white background.
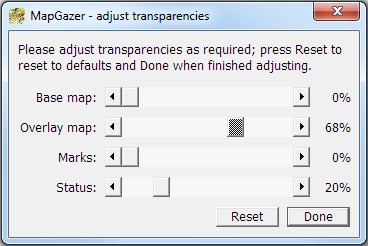
The transparencies dialog
The above options can all have their transparency varied interactively by moving sliders in the Adjust transparencies dialog; the slider arrows change transparency at 5% intervals.To open the transparencies dialog, select the Map → Map transparencies menu item (also available from the map pop-up menu), or press the ‘t’ key. The ‘Overlay map’ and ‘Third map’ sliders are only included if the corresponding map is present in the view.
The slider settings are independent and apply to the view from which the dialog was opened; the settings for the last-seen view are saved when MapGazer is closed. Press Reset to reset all transparency settings to their default values.
Mark transparencies
Individual marks can also have their transparency set by using the slider in the mark’s Properties dialog.The transparency used to display a mark is the greater of its own transparency setting and the ‘master’ transparency setting described above; the master slider can therefore be used to hide all marks to allow a better view of the map alone. In the case of a Route Waypoint, the Route transparency overrides the Waypoint’s transparency.
When a mark is saved to a GPX file its transparency is saved along with its colour and other properties.
Overlay maps
To overlay a second map over the base map, select the Map → Add overlay map menu item; a third map can be overlaid using Map → Add third map.
Overlaying maps lets you see (for example) how geological information relates to topographic or satellite imagery, or see street map information along with topography. You can then vary the overlay maps’ transparency using the sliders in the Map → Map transparencies dialog, as described above, or by pressing the ‘+’ or ‘−’ keys as described above.
You can try this for yourself by using the provided SampleMap as the base map and then adding the SampleGeology map as the overlay map.
An active overlay map can be changed using Map → Change overlay map or removed using Map → Remove overlay map and similarly for the third map. The overlay maps options are also available from the map pop-up menu.
Note that you cannot change the number or size of maps shown in a view while the transparencies dialog is being shown.
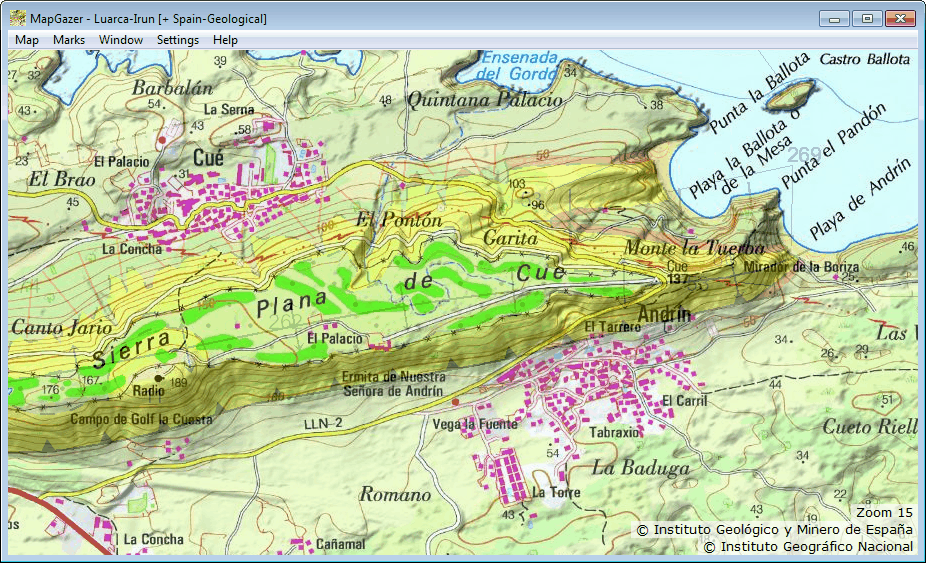
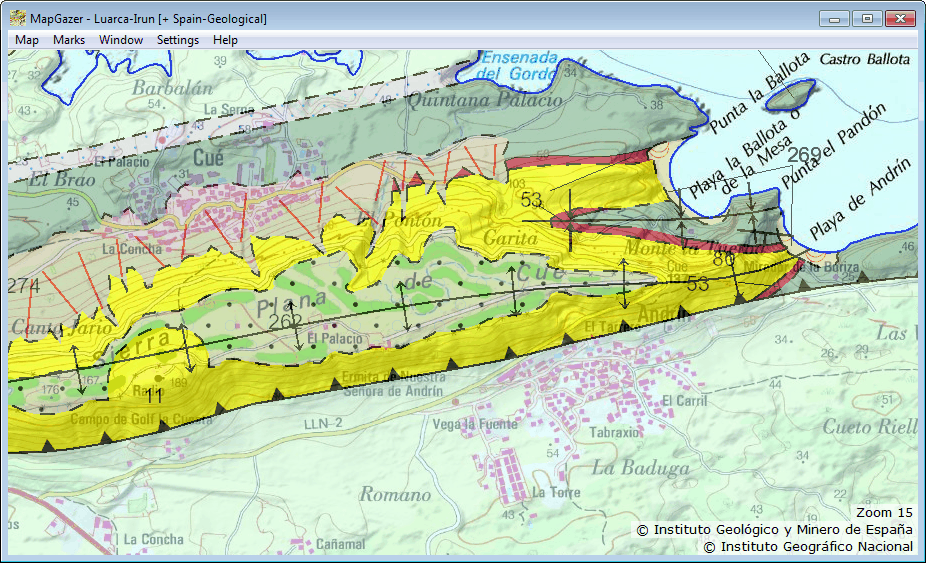
Please click here for an animation (13MB) of varying the transparency of a geological map overlaid over a topographical map. Below are two ‘stills’ from that animation.


