Using marks:
Waypoints
Tracks
Routes
Areas
Images
Scales
Mark properties
A route is typically a plan for a journey; it has a start and an end point and often has intermediate route waypoints. MapGazer lets you create routes, and they can be loaded from or saved to GPX (Global Positions eXchange format) files.
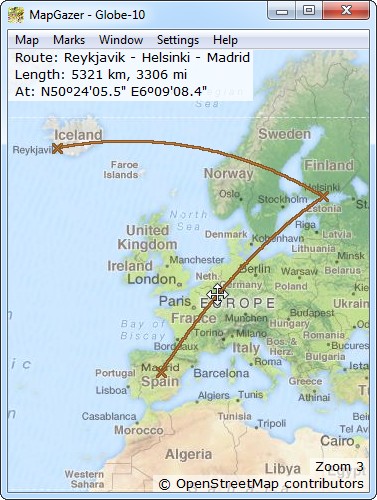
To create a route, select the Marks → Add new route menu item (or press the ‘r’ key). This will add a route to the screen; you can then left-click on either endpoint of the route and drag it to a position of interest. The distance covered by the route will be shown at top-left of the map when the cursor is over, or dragging, part of the route; similarly, the bearing of the current route segment is displayed. The latter makes it easy to plt a route at a specific bearing, for example.
Alternatively, to start a route at a given point, right-click on the map and select Add new route on the pop-up menu. This will place one end of the new route where you clicked on the map; the other endpoint can then be dragged to the desired position (the initial endpoint can also be adjusted by dragging).
A route is not affected by zooming. You can zoom in to accurately position one end, then zoom out to see a bigger picture, then zoom in again to position the other end, etc. You can also open a second window (press ‘v’) and then use the two windows to zoom in on each end of the route to position each more accurately.
Note: depending on the zoom level, the route may appear curved – this is because it shows the great circle (shortest distance) route between the two points at its ends.
To add route waypoints to a route, you can either:
- right-click on the route between existing points and select Add route waypoint (this will add a new waypoint to the route, which can then be dragged with a left-click), or simply
- left-click on the route between existing points; this will add a new waypoint to the route, which can be dragged immediately.
If a route has one or more waypoints (i.e., it has more than one segment) then when a waypoint is selected by cursor the angle between the segments will be displayed in the status.
To see route status, such as its length, move the mouse cursor over the route. The status that will be shown (unless turned off – see General settings) at the top left of the map includes:
- the name and caption of the route (if available)
- the length of the route
- the bearing of the current route segment, or, if at a waypoint, the waypoint’s bearing from the previous waypoint (except if over the first waypoint then the bearing to the second is shown)
- any web link associated with the track
- the latitude and longitude of the recorded point nearest the cursor
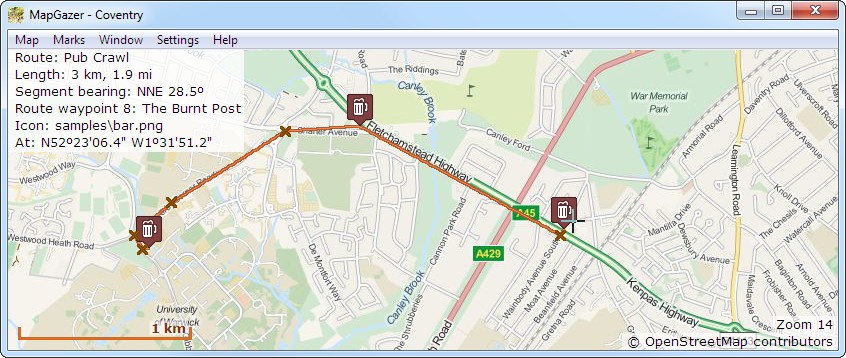
- if the cursor is over a route waypoint, its number (1 is the first waypoint in a route), its name, its icon name (if any), and its position will be shown.
You can also copy details to the clipboard, for use by another application, by right-clicking on the route and selecting the Route details item on the pop-up menu; this will display a dialog with the strings that can be copied.
To select the units used for distances, select Settings → Measurement units on the menu bar; here you can choose any or all of Metric, Statute (customary), or Nautical units. Similarly, you can select Latitude and Longitude formats using Settings → Position formats; see the General settings page for details.
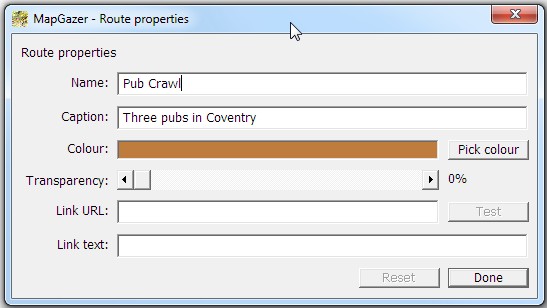
You can change the properties (name, colour, link URL, etc.) of a route or route waypoint by right-clicking on the route or waypoint and selecting Route properties; for more details, see Mark properties. Route waypoints, like waypoint marks, can have assigned icons – see the screenshot below. To clear the icon from a route waypoint (so it will be drawn as an ‘X’ by default), click the Clear icon button.
You can change the displayed width of routes and other marks using Settings → Line widths.
To remove a waypoint from a route, right-click on the route waypoint and select Erase route waypoint on the pop-up menu (this is only possible if the route has more than two points).
Routes can be loaded from or saved to GPX files.
To load a GPX file, use the Marks → Load marks from GPX file menu item (or press the ‘L’ key). This will open a dialog which you can use to select the GPX file to open. Any marks (tracks, routes, waypoints, etc.) in the file will then immediately be shown on the map (you may have to zoom or change the map, or move it, for the marks to be in view).
Depending on the source of the GPX file, routes may have a default (light brown) colour or may have a colour that was selected at the time the route was created.
If a route has been loaded from a GPX file it can be edited as described above (it is initially ‘locked in position’ to prevent accidental relocation; use the route’s pop-up menu and select Allow dragging to unlock the route – this is automatic is you add a route waypoint to a route). At any time you can reset a route loaded from a GPX file to its original data by right-clicking on the route and selecting Reset route.
To save a route right-click on the route and select Save route to GPX file on the pop-up menu to save the route as a GPX file. Alternatively, all marks (including all routes) can be saved using the Marks → Save marks to GPX file menu item (or press the ‘s’ key).
To delete a route, right-click on the route and select Delete route on the pop-up menu. This does not affect the GPX file from which the route was loaded but the route will not be included in a Save.
Here’s an example of a route where some route waypoints have been assigned icons:


