Using marks:
Waypoints
Tracks
Routes
Areas
Images
Scales
Mark properties
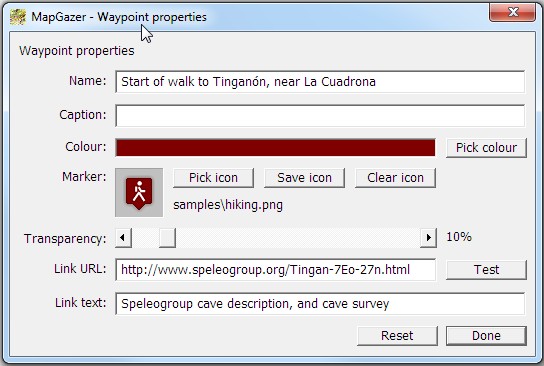
By right-clicking on a mark (track, route, a route waypoint, a waypoint, an image, or an area) you can select properties (e.g., Waypoint properties ...) on the pop-up menu to edit its properties; with the exception of aspect ratio, changes are applied immediately. The mark properties include:
- The name of the mark (generally a short nickname for it);
to change this, just edit the displayed text.
- The caption of the mark (often a longer text that expands
on the name); to change this, edit the displayed text.
- The colour of the mark, which is displayed in a rectangle;
to change it, click the adjacent Pick colour button (this will
open a standard ‘colour picker’ dialog – be sure to click its OK
button to confirm your selection).
- The marker icon for a Waypoint mark or a Route waypoint.
For either kind of waypoint an icon (or, if none is assigned, the
default drawn ‘X’ symbol) is displayed in the properties dialog.
To choose an icon, click the adjacent Pick icon button; see Using icons for more details. Once an icon has been assigned, you can
save it (perhaps after changing its colour) by clicking the Save
icon button. To clear an icon (so that by default the waypoint
will be displayed as an ‘X’ or dot), click Clear icon.
- The transparency of the mark (0% though 100%) – see using Transparency for details.
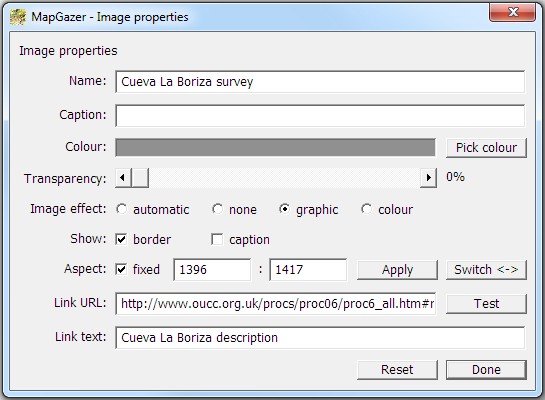
- The image effect used when displaying an Image. This may
be none (the image is displayed as-is) or it may be graphic
(white or near-white areas of the image are excluded from the image
and are transparent, and transparency of the remainder depends on
brightness); the graphic effect is useful for showing images
such as drawings or cave surveys. The image effect may also be automatic,
which means that MapGazer will attempt to determine which effect
to use automatically, or it may be colour which treats the image
as a graphic using the mark colour.
- The image attributes to be shown when an Image is displayed.
You can show or hide the border of an image, and similarly show or
hide its caption (if it has one).
- The aspect ratio of an Image or an Area. The aspect ratio
is a pair of positive integers (width and height values) which define
the ‘shape’ of an image or area. If an aspect ratio is given and
‘Fixed aspect ratio’ is checked then when the area is adjusted by
dragging an edge or corner it will maintain the requested ratio.
This is useful for saving an image with specific proportions, for
example, 16:9 for a common monitor shape or 17:22 for ‘Letter’ paper
shape.
After entering a desired aspect ratio, click the Apply button to change the shape of the image or area. The Switch button is enabled if the aspect ratio values are different; clicking the button will switch the Area between Portrait and Landscape format, anchored on its SW corner, and apply the change.
- The link URL of the mark; if a mark has a link URL then the
pop-up menu (shown by right-clicking on the mark) will have a Browse ...
menu item which will open the URL. In the edit properties dialog
you can can edit the URL and/or click the adjacent Test button
to check the URL is correct. Deleting the link URL deletes the link.
If you enter a link URL with no embedded colon (‘:’) MapGazer will
prefix the link with http://.
- The link text of the mark; this is text that describes the link URL; if specified it will be displayed instead of the URL in the status for the mark.
Changes are applied to the displayed map and marks ‘live’ (that is, as you edit fields, pick a colour, etc.). At any time you can reset all properties to the values they had when the Properties dialog was first displayed by clicking the Reset button. The Done button closes the dialog and has no other effect.
The properties option on a pop-up menu will only be enabled if you have no properties or details dialog already open for the mark. Multiple properties and details dialogs, for different marks, are permitted, however – these can be useful for copying data between marks.
Here are screenshots of the properties dialog for a Waypoint and
for an Image, showing the various editable fields and buttons:

