PanGazer – introduction
PanGazer is a viewer and editor for images which includes support for spherical panoramas (as captured by drones, etc.). PanGazer automatically detects if an image is spherical; other images are viewed as usual.
When viewing any image you can compose a view by panning, tilting, and zooming. The view can then be saved at the full resolution available (100%). Uniquely, PanGazer adds the adjusted focal length and other metadata to the view – the result is essentially a new photograph. This is especially useful with spherical images, allowing the creation of views at different zooms and directions, etc.
PanGazer is free (and advert-free); it runs on Windows and also in Windows emulators on Linux and MacOS.
This screenshot is a view of the ‘starter’ panorama (of Bejes in the Picos de Europa) which is shown when you first start PanGazer:
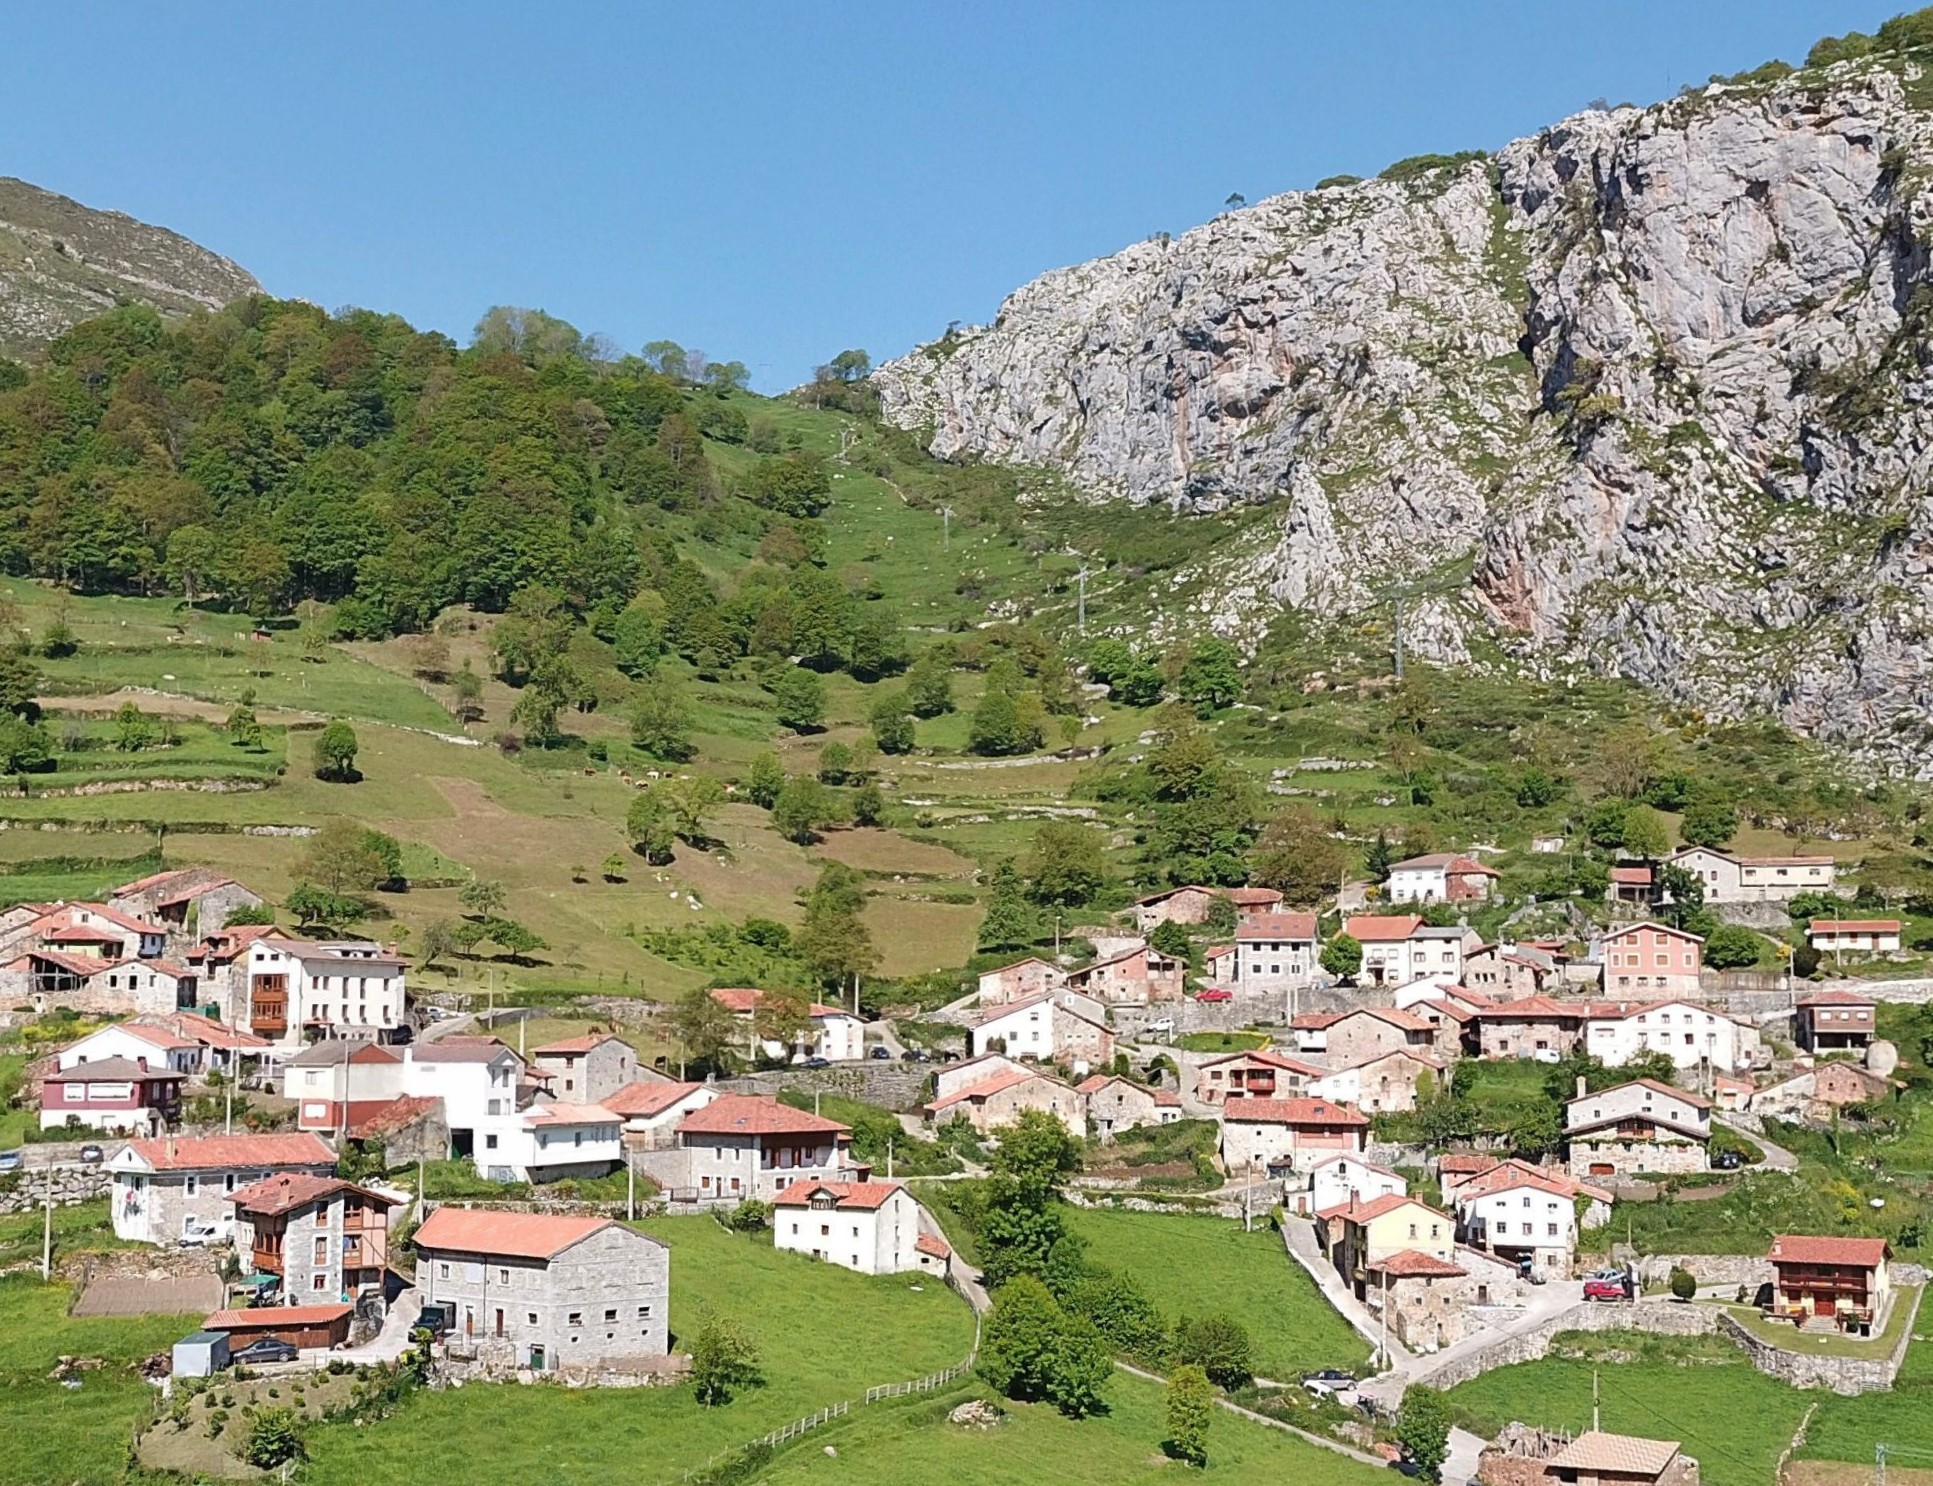
PanGazer screenshot – click for a ‘clean’ 100% image
Please click on ‘Getting started’ to the left for an overview of PanGazer, or on any other menu item for more details.
PanGazer features
- PanGazer lets you view a spherical panorama from any camera viewpoint
by dragging and zooming, then lets you save the view as seen
or at 100% (the resolution of the source image), as seen if
you click on the image above. In other words, you can compose and
save multiple rectangular images from any spherical image. This
is especially useful for drone photography where a single spherical
panorama can be used to create multiple images at full resolution.
Unlike a simple screenshot, PanGazer saved views include data such as the lens focal length (calculated from the actual view) and also, if available, the location, bearing, camera tilt, and other data derived from the original image. This allows saved views to be presented correctly (with correct angles, grid, etc.). Further, a saved view of a view will also have the correct data.
- PanGazer automatically detects spherical panoramas – even
those with no Exif or XML metadata. The correct horizon will be
set for ‘part-spherical’ panoramas (e.g., drone panoramas, which
sometimes include only 40° above the horizon).
- If the bearing and/or tilt are known from Exif or XMP metadata,
or are set by the user, compass points (N, S, etc.) or bearings
and tilt angles can be overlaid on the image to indicate direction
and tilt (see the screenshot above for an example). Further, you
can overlay North and horizon lines or a full grid of tilt
and bearing lines on any image.
- A number of shortcut keys are provided for common actions
– you can try these on the starter image. For example, %
zooms to 100%, # toggles the tilt and bearing grid, @
toggles between displaying compass points and bearing angles, and
the Space Bar toggles between showing and hiding all selected
status and overlays,.
- You can use PanGazer to view almost any image (not just panoramas);
again you can save any view of an image, which makes it much
easier to gauge the composition than using a ‘crop tool’. Image
data (effective lens focal length, attitude, geography, etc.) are
calculated and included in the saved metadata where possible.
- Multiple views (windows) are supported – you can view different
images, or the same image, from multiple angles and zooms at the
same time. For example, you can compare still images with views
from a spherical panorama. You can also explicitly set the aspect
ratio of any view (to compare compositions, for example, or to
suit a particular display or print size).
- Part-spherical panoramas can be filled to make full-sphere
panoramas, for use in social media, etc. In addition, nadir
fill (or zenith fill) can be applied to hide a tripod or person
holding a 360° camera. In all cases, only data from your image
are used (unlike some “AI” fillers that use data from other people’s
images).
- Missing data at poles (‘black holes’), as in sphere panoramas
from some drones, can be filled automatically on image load or explicitly.
- PanGazer emphasises and simplifies the viewing and editing of image
geographical data; you can set or edit the geographical values
directly (location, elevation, True North bearing, and tilt), which
will then be saved in the image Exif metadata. For spherical images,
additional values (including initial camera stance and zoom) are
saved in the image XMP metadata.
- If the image location is known or set you can show its location
on maps, including Google satellite or regular Maps, MapGazer,
or Google Earth. You can also show the view direction using
a GPX or KML viewer if North has been set, or save the image location
as a GPX or KML file.
- In general, PanGazer tracks image geometry; for example,
when zooming in or out while viewing an image the pel (pixel) ratio
(the number of pels used on-screen for each pel in the original image)
is displayed, along with the equivalent focal length of the view
you are seeing and the measured angles of view. In full-spherical
images you can zoom out to an full-frame equivalent focal length
of 8mm.
- PanGazer does not require an internet connection to run (except
for a few internet-specific features); in particular, all the Help
pages are included in the package and are accessible when your computer
is offline or in flight mode.
- Strong viewing enhancements (brightness, etc.) are available
to help you identify features of interest.
- PanGazer uses a fast multi-threaded implementation of the gnomonic
projection which reduces apparent distortion of horizontals and
verticals. Interpolation is used to improve the display of zoomed
or low-resolution images. During dragging a reduced resolution is
used on slow machines for improved performance.
- The user interface (e.g., dragging left or right) works the
same way on both rectangular and spherical images. Further, the
user interface is modeless; you do not have to ‘enter panorama view
mode’, for example.
- The ‘retro’-style menu bar allows a large visible image.
Also, the menu bar and/or title bar can be hidden, or you can view
all images full-screen (use ‘Escape’ or ‘F11’ to toggle between full-screen
and a window).
- Very large images (up to the 65K×65K limit – 4 GigaPixels – of JPEG images) can be loaded, provided that sufficient RAM memory is available. In most cases a progress bar will be shown if loading a JPEG image will take more than a second.
PanGazer requirements
PanGazer runs on a Windows personal computer (PC, laptop, or tablet, running Windows 10 or later); it also should run on Windows 7, Windows XP, and Windows emulators on Mac OS and Linux, but is not fully tested in those environments.
Both 64-bit and 32-bit executables are included, along with a ‘stub’ 32-bit executable that will start the best main executable on any version of Windows. The 32-bit executable will run on 32-bit Windows systems but large panoramas and images (e.g., more than 12,000 × 6,000) may fail to load due to memory fragmentation. With either executable you may have difficulty loading large images if you do not have several GigaBytes of RAM. It is recommended that you run a 64-bit version of Windows if possible.
PanGazer lets you load and view many types of images (JPEG, PNG, GIF, BMP, TIFF, etc.). When saving an image, PanGazer uses JFIF (the JPEG File Interchange Format, file extension .jpg or .jpeg) so that metadata (geolocation, camera bearing, tilt, zoom, etc.) can be saved with the image using Exif and XMP metadata.
PanGazer status
I am currently actively developing PanGazer, so do please send
me suggestions for improving PanGazer (click here for contact details »). PanGazer has been written from scratch
(sharing most of its 43,000 lines of code with my MapGazer »
application), but has been inspired by and depends on the work of
many other people; please read my thanks, here.
The PanGazer ‘starter image’
Here is a reduced version of the plain (un-projected) PanGazer starter image, stitched from 34 images taken using a DJI Mavic Pro drone (the download package includes a larger and more detailed version, as well as a smaller automatic fallback version for older PCs and laptops). It is an equirectangular JPG image so it appears distorted (the entire bottom row of the image represents a single point – the nadir).

A 360° source image (reduced in size 24×)
You can also view the starter image using Google Maps on a PC or smart phone: search for “Bejes, Spain”, click on the ‘little yellow man’ and scroll right to 225m due East of the car parking area at the southern entrance to the village (and about 100m SSW of the church); you should see a small blue circle. Clicking on the circle should display the panorama. This upload of the starter image, saved as a sphere, was done using the Google Street Map app from a mobile phone; see the Sharing Images page for more details.